


Beginning the “Phil Series” — new model — new series. Phil was meek. At times I wasn’t clear why he had volunteered to do this. It was clear that I — the observer — was going to have to bring more to the interaction than I had with Michael (the last series). Seven sketches produced — this is my work on the third sketch.
Day One
Step 1: The original figure sketch. (This sketch was very sketchy — the model was uncomfortable and almost shy.)
Step 2: Activating the space around the figure. Filling the space around the figure. (Tentative and unfocused.)
Step 3: Color and darks. (The figure felt trapped in limited space the model was taking up.)
Step 4: Washes and defining larger shapes. (Feeling constrained and contained.)
Step 5: White wash. (The emergence of other “figures” on the canvas — other presence holding the figure in place.)
Step 6: Push through lines. (Integrating the figure in the surrounding environment — breaking through the lines or being overwhelmed.)
Day Two
Step 7: Foreground and background (more color, more dark). (The figure appears restricted by the darkness.)
Step 8: White wash (again) — redefining figure and looking for any “emerging” figures. (One dark figure in the upper right (background) and one lighter figure in the foreground (lower left).
Step 9: Positive and negative — contrast. (Defining the “figures” with contrast not lines.)
Step 10: Shaping the negative space. (Color and line in the negative space — seeing what’s there.)
Step 11: White wash (again) — adding structure by paying attention to composition. (Barriers and separation in the space between.)
Step 12: Pushing the elements to really see what’s there — foreground, background, shapes, figures — defining the space between the object and the viewer. (Creating relationships and paths for the eye to follow.)
Day Three
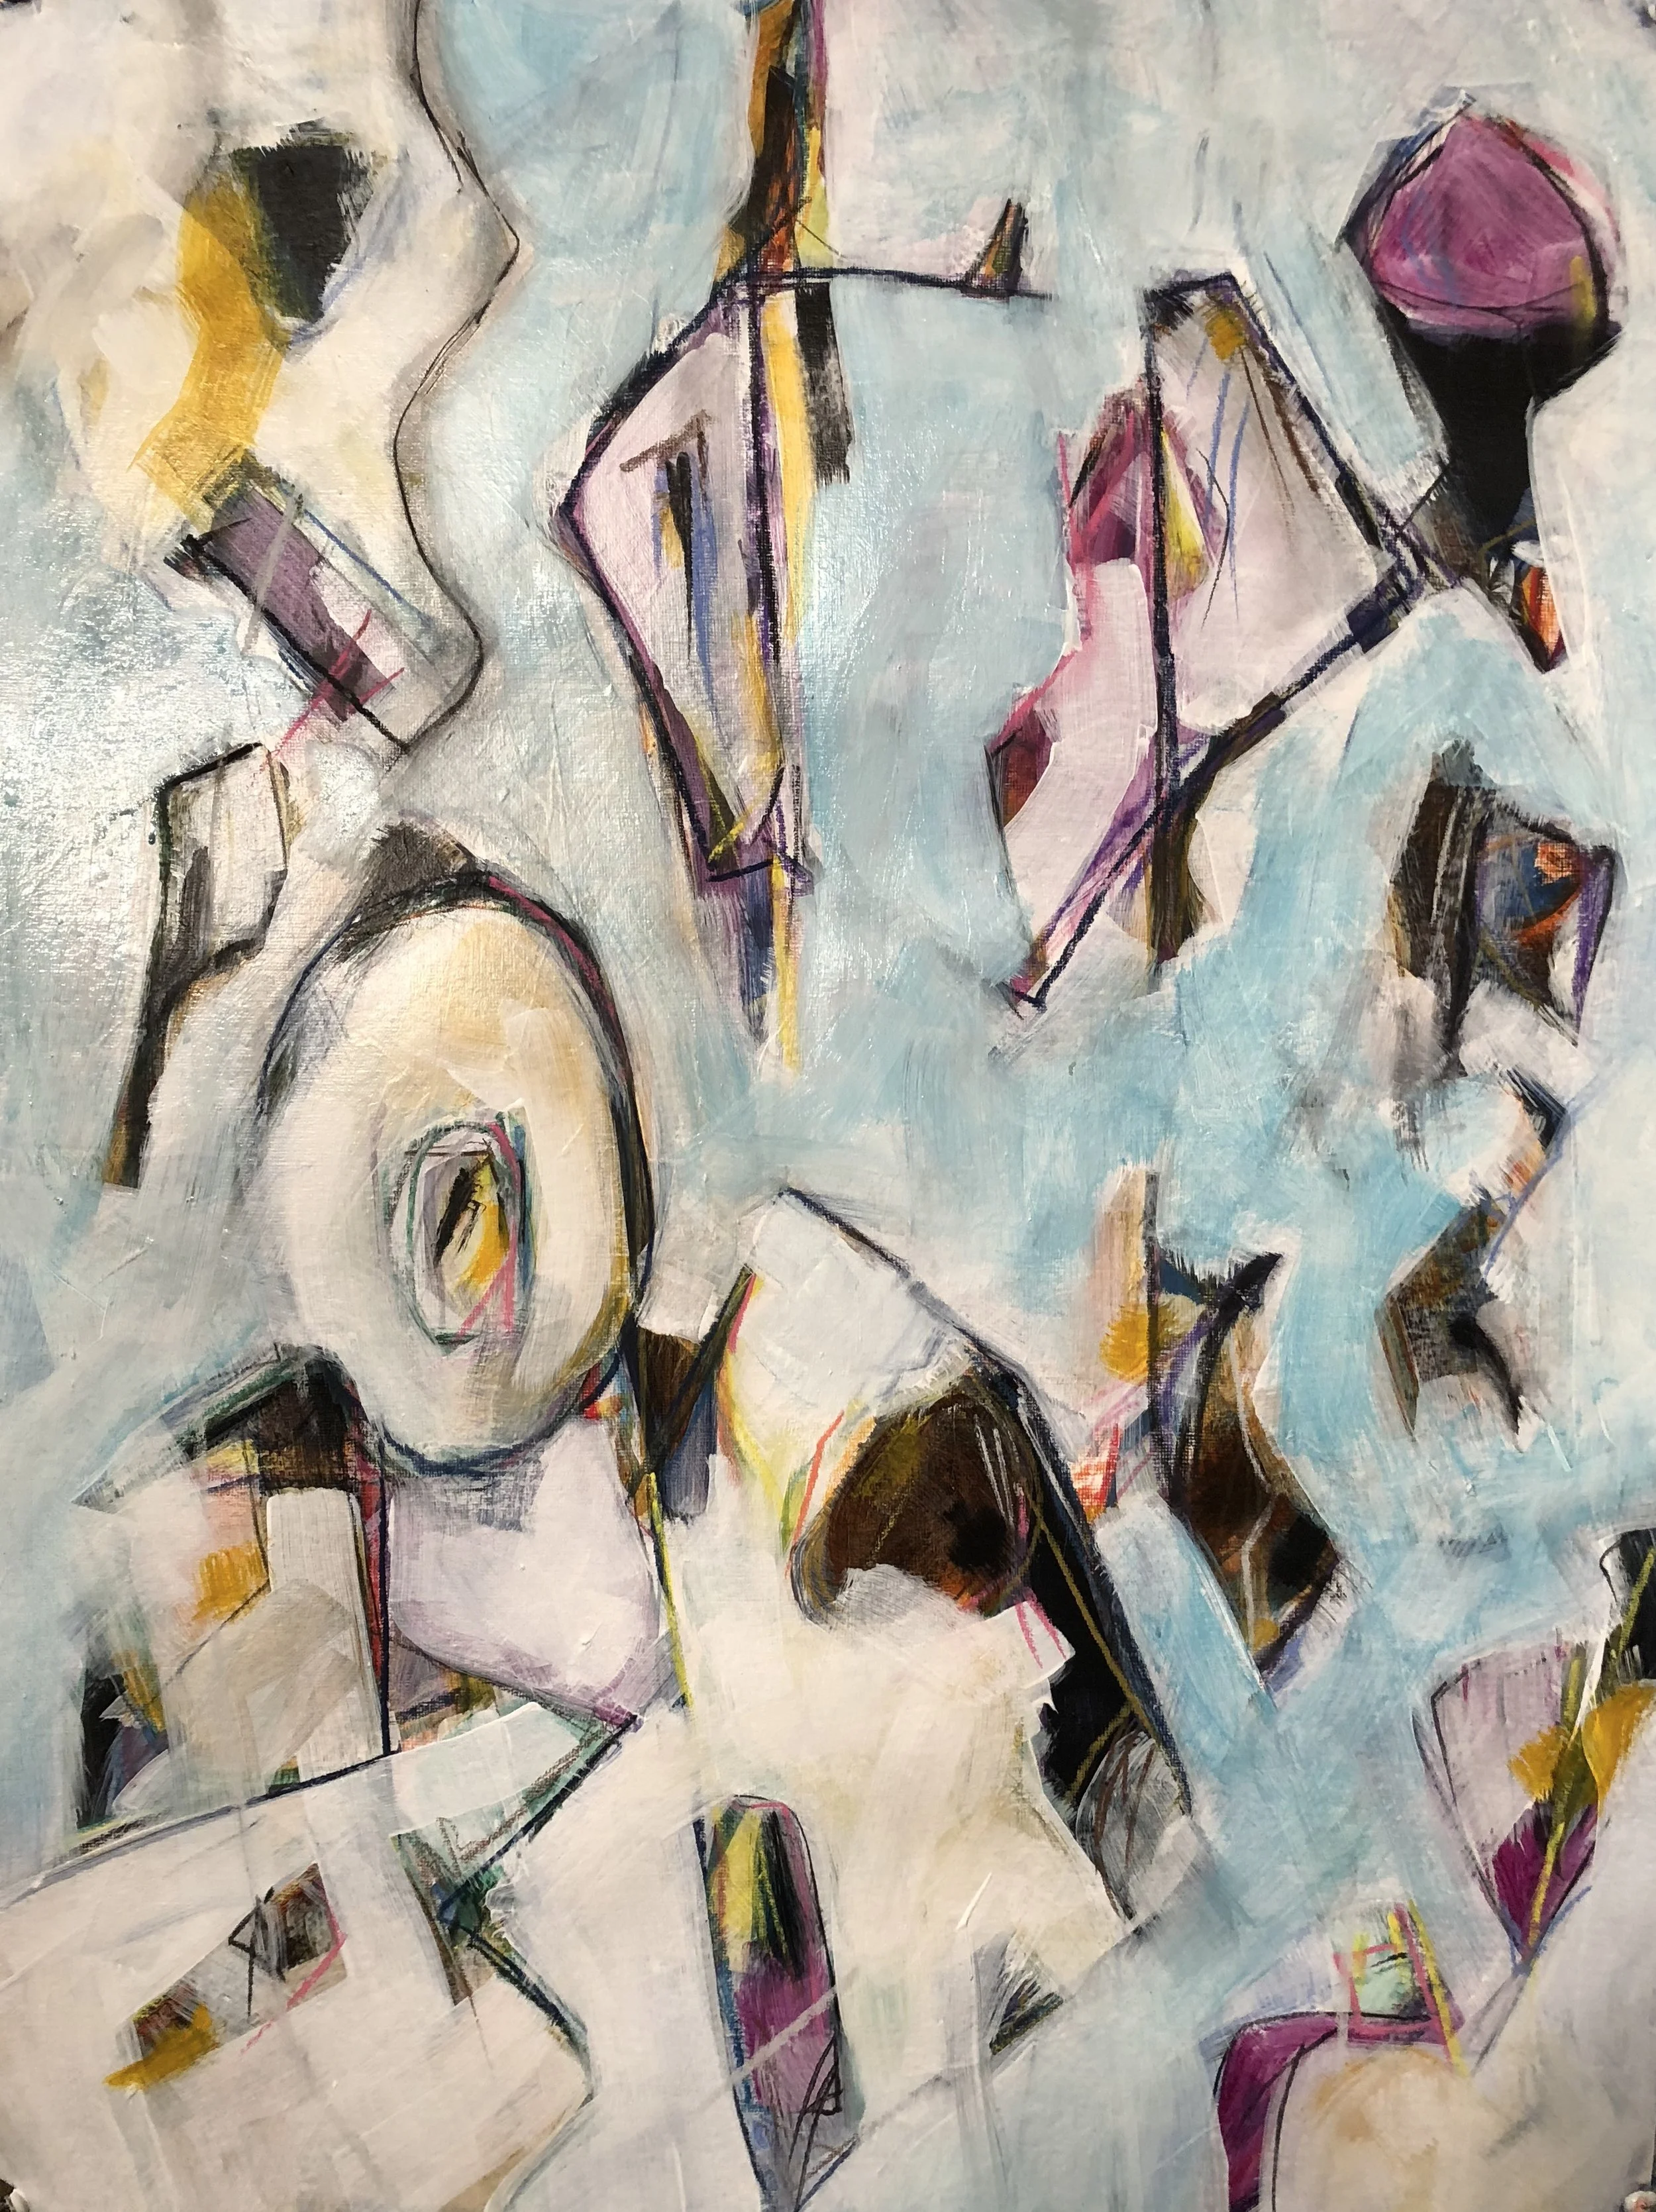
Step 13: Editing — what’s important (and letting go of what isn’t). In this case it was the original figure that needed to go. (Leaving a hint of the original figure — which wasn’t much to begin with and emphasizing the forces surrounding it.)
Step 14: Final white wash — limiting the contrast, telling the experience, bringing the object and the viewer into the same plane. (Making sure there is a reason to linger — places for the eye to linger and move — hints of figures without being explicit — allow the viewer to see what they will while staying true to my experience — an unsettled search to find what/who is really there.)